“A path not chosen is the same as a path that never existed.” – Rau Le Creuset
Follow Up: The last article we introduced you to the world of Gundam and Gunpla. Now that you have had a taste we will begin to enter into the unboxing and building faze of Gunpla.
Opening the box: Bandai has several versions of their model kits essentially the originals come in colorful packaging along with pictures of the built kits on the side of the box. Parts inside the box vary in colors but for the most part, they are standard colors. Premium Bandai kits come in a black and white styled box. What makes these kits stand out more is the colors are vivid almost neonish in look. There are other subtle differences like stickers water slides compared to rub on and some kits are clear colored. Not all kits are available through Premium Bandai this does not mean they never will be either.
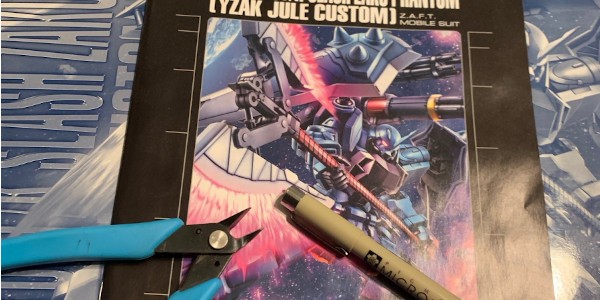
The next steps do not have to be in any certain order however this is my way of working through a kit. Tools you will need for your build begins with nippers. Now there are several types and you do not have to be picky for now but if you are a perfectionist you will want to invest in a set of “God Hand Nippers. The spn-120 Ultimate nipper 5.0 specializes in gate cutting and pursues the “ultimate cut”. Because of its sharpness, it can obtain a smooth cut surface as if the cut had been made by a hobby knife. To dumb it down for beginners it makes cutting your parts out of the plastic raft support much cleaner looking. Using regular nippers leave behind a bit of plastic on your pieces as well as leaving a whitish stress look which will need to be cleaned up if you want to make it look better I/E sanding and painting. If you are into customizing your kits this won’t make a huge difference if you plan on changing the entire paint scheme. How you choose to remove the pieces is entirely up to you it comes down to preference.
Panel lining is another custom step. Panel lining is the process of drawing fine lines around the detailing of model … Use a gray marker for white and light gray parts and black for darker colors. This method gives your model pop without having to go full custom on it. We will touch on other easy customizing at a later date.
So back to opening the box. Upon opening the box you will notice parts are separated into bags. You will also notice each section is labeled a-z and you’ll also notice some will have a letter followed by a number. I like to open all of them and place them in order from A on. I usually place them back into the bottom box and begin that way however while unbagging I will also panel line all the pieces. I find this to be easier because they will need time to dry. Do not worry about mistakes there are ways to remove the extra ink off the plastic as need be. There are different ways to line and many different pens to do it with I prefer a good old fashion .005 pen others like the dip pens its a matter of preference and what you will be comfortable with. You can also purchase tray-style parts holders or if you know someone with a 3d printer the file to make one or a few. The file is on Thingiverse for free download.
Finally, If you open the directions you will notice they are written in Asian. Don’t let this deter you pictures are easy enough to follow and if you still have trouble you can always use google translator to read the words. This is why it is better to start with the easier kits and work your way up. As you move through kits it becomes easier to follow. The follow-up articles that will come after this one I am unsure how I want to do them Feedback is always nice. So if you would rather me keep going like this or want video tutorials let me know I will do either or. I prefer writing but I think video would be easier to follow. So next up we will begin building kit
no images were found

